Тарифы — это варианты вашего продукта с разным наполнением и ценой. Они помогают:
- Предложить выбор клиентам с разным бюджетом.
- Увеличить средний чек — пользователи могут выбрать более дорогой вариант.
- Гибко настроить предложение под разные потребности аудитории.
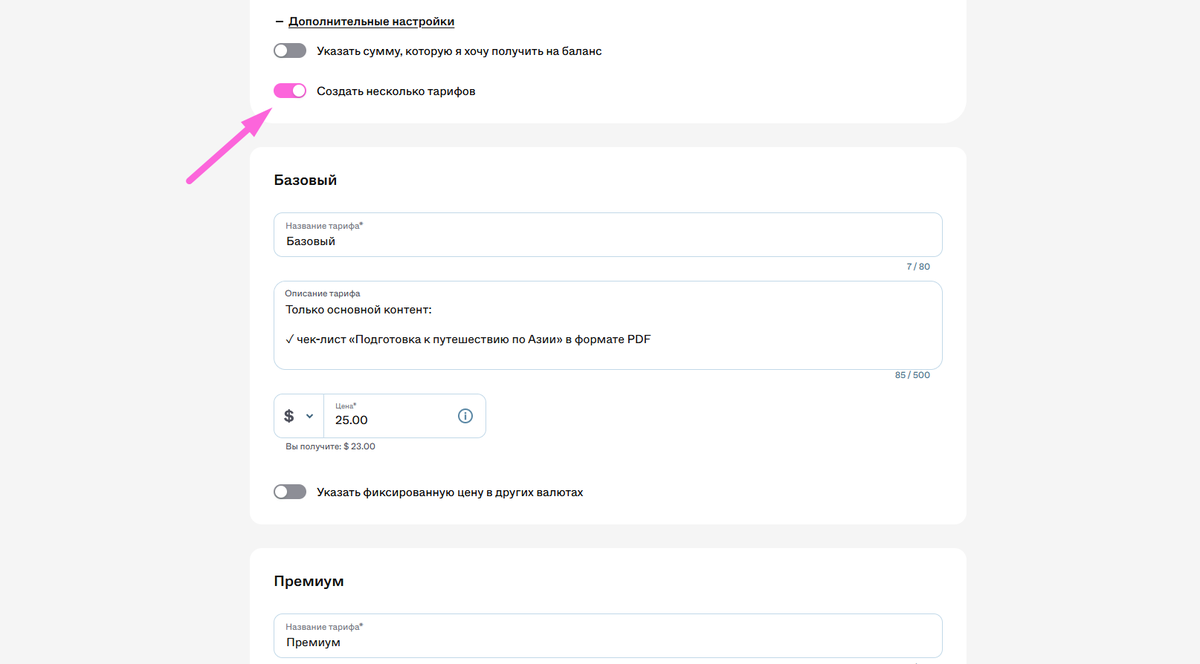
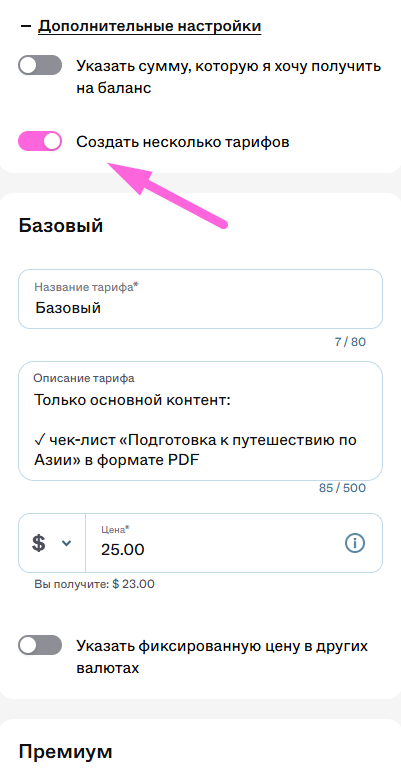
1. При создании продукта нажмите «Дополнительные настройки» и выберите «Создать несколько тарифов».
2. Добавьте нужное количество тарифов.
3. Для каждого тарифа укажите:
- название — например, «Базовый», «Стандарт», «Премиум»,
- описание — что входит в этот вариант,
- цену.
- Базовый: только основной гайд (500₽)
- Стандарт: гайд + дополнительный чек-лист (1 000₽)
- Премиум: всё выше + личная консультация (3 000₽)
- Сам себе ученик: доступ к урокам (2 000₽)
- С проверкой: уроки + обратная связь в чате (5 000₽)
- VIP: всё + три личных созвона (15 000₽)
- Разовый: один час консультации (3 000₽)
- Пакет: три часовых консультации + чек-лист (8 000₽)
- Полное сопровождение: консультации + чек-лист + поддержка в чате (20 000₽)
Важные нюансы
Платная часть общая для всех тарифов — здесь размещайте:
- контакты для связи,
- инструкции по получению доступа,
- универсальные материалы (если они есть во всех тарифаx).
Если контент на других ресурсах:
- в платной части давайте доступы к внешним платформам,
- четко указывайте, что входит в каждый тариф.
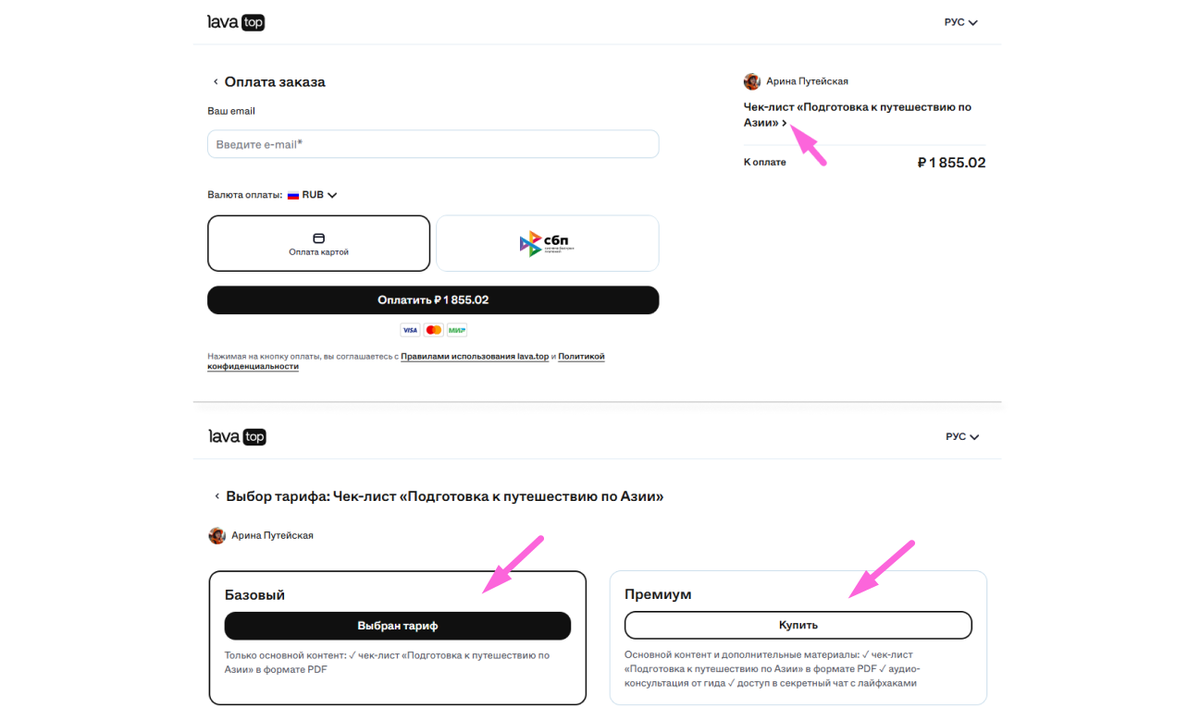
На странице продукта видят все варианты: могут сравнить содержимое каждого и выбрать подходящий перед оплатой.
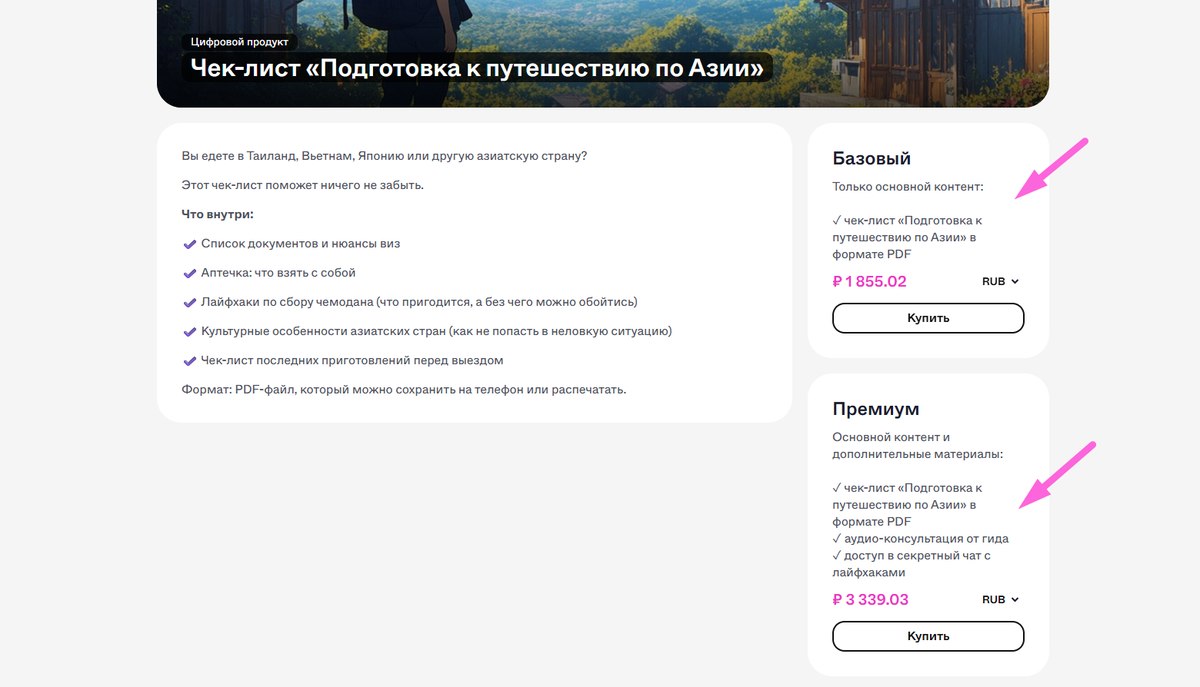
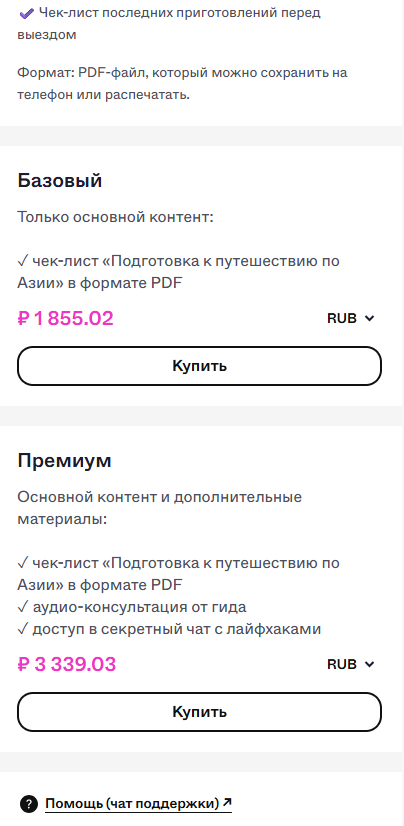
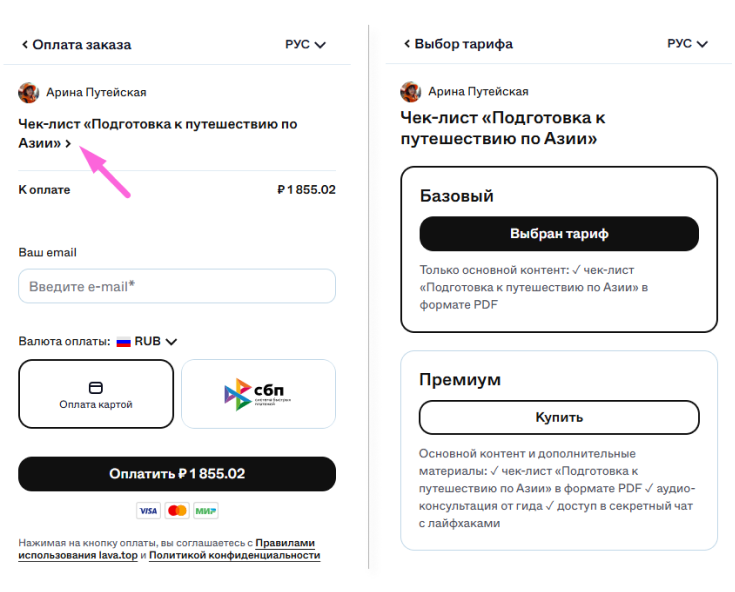
Также все тарифы можно увидеть на странице оплаты:
Теперь вы можете создавать тарифные планы, которые помогут увеличить продажи!
Была ли эта статья полезной?